Knowing how to blur in Canva is one of the most useful skills for creating professional-looking graphics. Whether you need to obscure a license plate, soften a distracting background, or create an artistic dreamy effect, the platform offers several intuitive ways to manipulate clarity.
This guide covers everything you need to know about the blur tools available. We will walk through the exact steps to blur whole images, specific areas like faces, text elements, and backgrounds.
How to Blur an Image in Canva (Whole Photo)
The most basic function is blurring an entire photograph. This is often used to create texture or a solid backdrop for overlaying text.
- Select your image: Click on the photo you want to edit on your canvas.
- Open the editor: Click Edit photo on the top toolbar.
- Find the Blur tool: Under the Effects tab, look for Blur.
- Choose ‘Whole Image’: You will see options for “Brush” and “Whole Image.” Select Whole Image.
- Adjust Intensity: Use the slider to increase or decrease the blur strength.
This method applies a uniform softness across the entire picture. It answers the common question of how to blur image in Canva quickly for background textures.
How to Blur a Specific Area in Canva
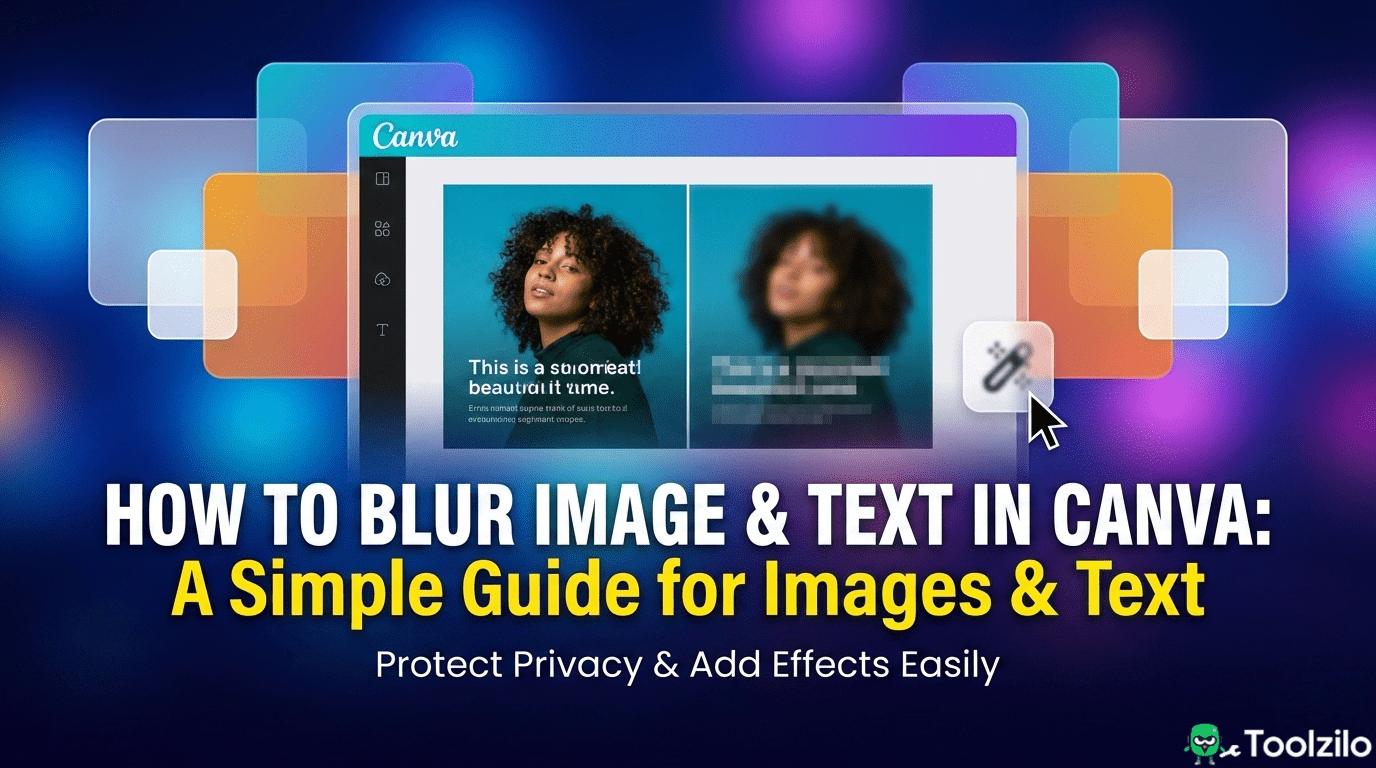
Sometimes you don’t want to lose the detail of the whole photo. You might just need to hide a brand logo, a face, or sensitive data. This is where the Blur Brush comes in.
Using the Blur Brush
- Click your photo and select Edit photo.
- Go to Effects and select Blur.
- Click on the Brush button.
- Adjust Brush Size: Change the size of the brush to fit the object you want to hide.
- Paint over the area: Click and drag over the specific part of the image you want to obscure. The purple overlay shows where the effect will be applied.
- Refine: When you release the mouse, the blur applies. You can adjust the intensity slider to make the object completely unrecognizable or just slightly soft.
Mastering How to Blur in Canva for Faces
Privacy is important in social media content. If you are wondering how to blur faces in Canva, the Brush tool is your best friend. simply zoom in on the subject, reduce your brush size for precision, and paint over the face. This is much cleaner than placing a solid shape over someone’s head.
How to Blur Background in Canva
A blurred background (bokeh effect) makes your subject pop and look more professional, mimicking a high-quality DSLR camera. While you can use the Brush tool to manually paint the background, Canva has a smarter feature for this: Auto Focus.
- Select your photo and click Edit photo.
- Under the Effects tab, select Auto Focus.
- Let AI work: Canva’s AI will automatically detect the subject and blur the background.
- Adjust Intensity: Move the “Blur Intensity” slider to control how soft the background looks.
- Adjust Focus Position: You can move the “Focus Position” slider to change which depth of the photo stays sharp.
This is the most effective method for those asking how to blur background on canva without spending twenty minutes manually painting around the edges of a person.
How to Blur Text in Canva
Blurring isn’t just for photos. You might want to create a “glitch” effect or a ghostly visual style with your typography.
- Select your text: Click on the text box.
- Open Effects: Click Effects on the top white toolbar.
- Choose Blur: In the Style menu, locate the Blur option.
- Adjust: Use the slider to determine how unreadable the text becomes.
If you are trying to figure out how to blur words in canva that are part of a screenshot (an image, not editable text), you must use the Blur Brush method mentioned in the previous section.
How to Blur Edges in Canva
Creating a soft vignette or fading the edges of a photo requires a slightly different approach, as there is no single button for “blur edges” inside the photo editor.
To achieve this:
- Go to the Elements tab.
- Search for “transparent gradient” or “blur gradient”.
- Select a graphic that fades from a solid color (like white or black) to transparent.
- Place these gradient elements over the edges of your photo.
This technique is the standard answer for how to blur image edges in canva to make them blend seamlessly into a colored background.
How to Blur in Canva Mobile
Editing on the go requires navigating a smaller screen, but the features remain powerful. Here is a quick guide on how to blur in Canva mobile app interfaces.
- Tap the photo you want to edit.
- Tap Effects on the bottom toolbar.
- Scroll to find Blur.
- Tap Whole Image to soften the full picture, or Brush to blur specific parts.
- If using the Brush, use your finger to paint over the area.
- Tap Done to save the changes.
The mobile experience is nearly identical to desktop, ensuring you can figure out how to blur picture in canva regardless of your device.
Frequently Asked Questions
Does Canva have a blur tool?
Yes, Canva has a dedicated Blur tool located under the “Edit photo” > “Effects” menu.
How do I blur part of a picture in Canva?
Select your photo, choose the Blur effect, click “Brush,” and paint over the specific area you want to hide.
Can I blur text in Canva?
Yes, select your text box, click “Effects” on the top toolbar, and choose the “Blur” style option.
How do I blur the background of a photo in Canva?
Use the “Auto Focus” tool under the Effects menu to automatically keep the subject sharp and blur the background.
Is the blur feature free in Canva?
Yes, the standard Blur tool and Auto Focus features are available to all free users.
How do I unblur an image in Canva?
You cannot sharpen a blurry original photo, but you can undo a blur effect by setting the intensity slider back to zero.
Final Thoughts on Blurring
Mastering the blur tools allows you to direct viewer attention and salvage photos that might otherwise be unusable due to privacy concerns or distracting backgrounds. Whether you are using the Auto Focus for portraits or the Brush for sensitive data, these simple steps will elevate your design quality immediately.